A lot of Solution Engineers or Architects use the virtual NetProfiler from Riverbed in a lab-environment to get familiar with new features or to demonstrate the power of NetFlow NPM analysis to prospects or customers. In the past, a lot of the technical peopled used the free VMware ESXi server in the labs.
What is Riverbed NetProfiler and Flow Gateway?
Riverbed NetProfiler provides global network flow analytics that you can use to quickly view network and application performance and troubleshoot issues before your end users ever know there’s a problem. NetProfiler combines network flow data with packet-based flow metrics to provide proactive monitoring, analysis, and reporting. Use NetProfiler to answer questions such as how much traffic do I have, who is using it, where is it going, and how is it prioritized?
Flow Gateway collects and forwards flow data (NetFlow, sFlow, J-Flow, IPFIX and other popular flow statistics) from network devices and Riverbed AppResponse packet-capture appliances. It deduplicates common information, and then forwards it to the Riverbed NetProfiler.
Why Proxmox and not ESXi?
Unfortunately, VMWare marked the popular free ESXi Server as End of General Availability (EOGA). This forces technical, curious people to look for alternatives. One alternative is the Proxmox VE (PVE) server. In this blog article, I will give you a brief introduction, how you can install Riverbed NetProfiler and NetProfiler Flow Gateway into a Proxmox VE lab-environment.
Please keep in mind, that this is not an official support instruction from Riverbed. Riverbed currently doesn’t support NetProfiler on Proxmox in a production environment. Please use this article only for a non-production installation (such as a test lab environment).
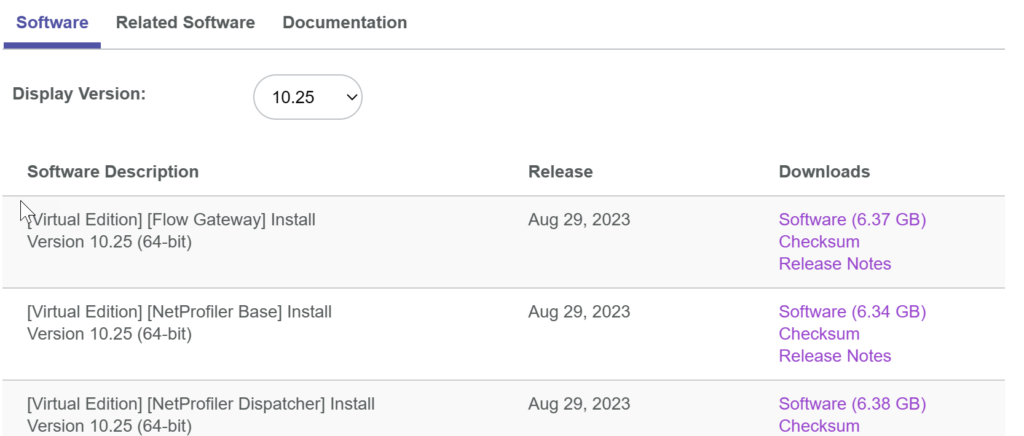
Step 1: Download Riverbed Virtual NetProfiler and NetProfiler Gateway OVA
In general, we can use the NetProfiler and NetProfiler Gateway OVA files, how you can download from the Riverbed Support page. To prepare the installation of NetProfiler in a Proxmox environment, please download the „[Virtual Edition] [Flow Gateway] Install“ and „[Virtual Edition] [NetProfiler Base] Install“ file.
Step 2: Upload the OVA files to your Proxmox Server and unpack the file
In the next step, please upload both OVA files to the Proxmox server. Please ensure that your selected upload directory has at least 30GB free disk space. If you’re using a Windows client, you can upload your files with WinSCP. On a Mac or Linux system, please use the SCP command to upload the files:
# Upload NetProfiler OVA file to the /root directory
scp ./netprofiler-10.25-base-542.ova root@ip_of_pve:/root/netprofiler-10.25-base-542.ova

# Upload Flowgateway OVA file to the /root directory
scp ./flowgateway-10.25-542.ova root@ip_of_pve:/root/flowgateway-10.25-542.ova
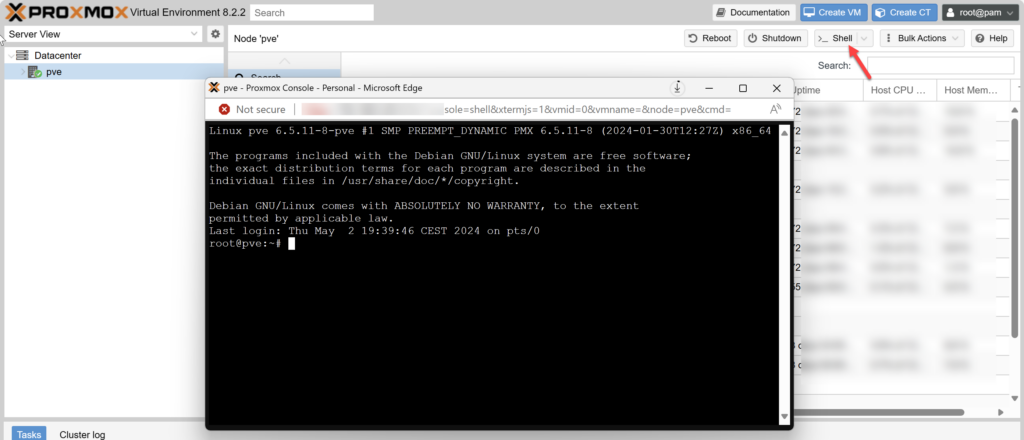
To unpack both OVA files, please open the SSH shell of the PVE server. This can be done with Putty, the ssh command or the Shell view in your Proxmox Console:
To unpack the OVA files, go to your upload directory (such as /root) and unpack the file with the following commands:
tar -xvf ./netprofiler-10.25-base-542.ova
tar -xvf ./flowgateway-10.25-542.ova
Step 3: Create VM
Before we can import the disks of the OVA files, we must create the VM in the PVE system. Please use the following configurations, to ensure that NetProfiler and Gateway will detect the environment as a valid VM.
VM for Riverbed NetProfiler
Press on „Create VM“ in the PVE Console and create a VM for the Riverbed NetProfiler:
| Name | Please select a name (such as NetProfiler) |
| VM ID | Please note down the ID, we need the ID later to import the disk |
| OS | Select „Do not use any media“ |
| SCSI Controller | VirtlO SCSI single |
| Machine | i400fx |
| BIOS | SeaBIOS |
| Disks | Accept default settings, this disk must be removed after the import of the OVA disk |
| CPU Sockets | 1 |
| CPU Cores | 4 |
| CPU Type | x86-64-v2-AES |
| Memory | 8192 (8GB) |
| Network Bridge | vmbr0 |
| Network Model | VMware vmxnet3 |
Do not start the VM yet. Please add a second network interface with the same settings:
| Network Bridge | vmbr0 |
| Network Model | VMware vmxnet3 |
VM for Riverbed NetProfiler Flow Gateway
Similar to the NetProfiler, press on „Create VM“ in the PVE Console and create a VM for the Riverbed NetProfiler Flow Gateway with the following configuration
| Name | Please select a name (such as NPGateway) |
| VM ID | Please note down the ID, we need the ID later to import the disk |
| OS | Select „Do not use any media“ |
| SCSI Controller | VirtlO SCSI single |
| Machine | i400fx |
| BIOS | SeaBIOS |
| Disks | Accept default settings, this disk must be removed after the import of the OVA disk |
| CPU Sockets | 1 |
| CPU Cores | 4 |
| CPU Type | x86-64-v2-AES |
| Memory | 8192 (8GB) |
| Network Bridge | vmbr0 |
| Network Model | VMware vmxnet3 |
Do not start the VM yet. Please add a second network interface with the same settings:
| Network Bridge | vmbr0 |
| Network Model | VMware vmxnet3 |
Step 4: Import disk from OVA file
In this step, we must import the disk from the Riverbed OVA files into the fresh created VM on the PXE server. For this step, you need the VM IDs of your NetProfiler and Flow Gateway VMs and the name of your storage where you would like to store the disk file (such as the default name ‚local-lvm‘).
Go back to your open shell (via Putty, SSH Command or Proxmox Console) and execute the following commands: (Please modify the vmid (here 113 and 114) and storage name (here ‚local-lvm‘) to your values)
# Command Syntax:
# qm importdisk <vmid> <vmdk-filename> <storagename> -format qcow2
# Import OVA Disk for NetProfiler
qm importdisk 113 /root/netprofiler-10.25-base-542.vmdk local-lvm -format qcow2
# Import OVA Disk for NetProfiler Flow Gateway
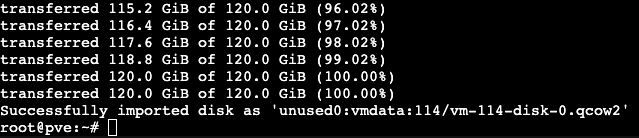
qm importdisk 114 /root/flowgateway-10.25-542.vmdk local-lvm -format qcow2The import is successful, when the qm command prompt:
Step 5: Assign original OVA disk to the NetProfiler and Flow Gateway VM
The Riverbed OVA disk file must now be added to the VM and the dummy disk should be removed. Please repeat the following steps for both VMs (Riverbed NetProfiler and NetProfiler Flow Gateway):
- Select the VM in the Server View (left panel) of the Proxmox Console.
- Select the Hardware View on the right panel.
- Select the Hard Disk (scsi0) in the right panel. This is the dummy disk.
- Click on Detach > The disk will be detached and shown as Unused Disk 1 in the Hardware view.
- Select the „Unused Disk 0“ in the right panel. This is the imported OVA disk.
- Click on Edit.
- Accept the configuration in the „Add: Unused Disk“ Window with Add > The disk is now attached as Hard Disk (scsi0).
- Select Unused Disk 1 (the dummy disk) and click on Remove > Confirm with Yes.
- Add another disk to store the data (see NetProfiler and Flow Gateway documentation) > Click on Add > Select Hard Disk > Select your Storage > Enter a size higher as 500 GB.
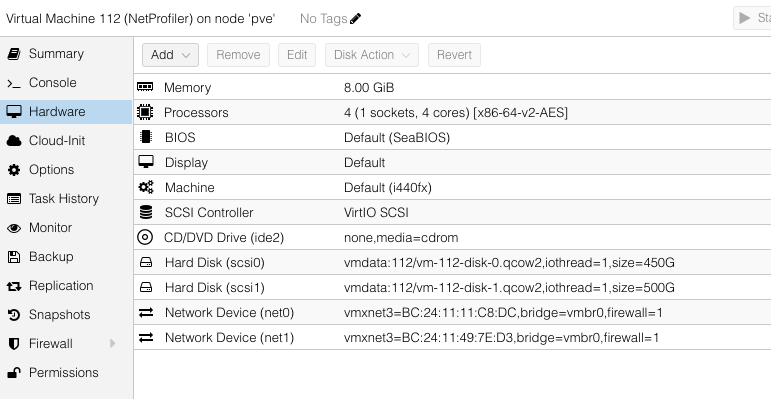
After the changes, the configuration of the VM should be like this:
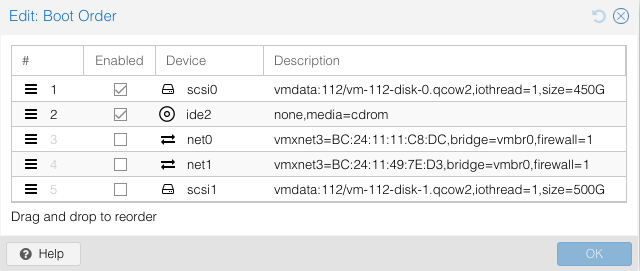
Step 6: (Optional) Modify Boot Order
Finally, I recommend double-checking the Boot Order in the settings of the VM. Select the „Options“ item in the right panel and double-click on „Boot Order“. Please move the scsi0 to the top, followed by the CD-ROM.
Step 7: Configure NetProfiler and Flow Gateway
Please continue with the normal configuration (described in the installation guides of NetProfiler and Flow Gateway).